We were running a couple of workshops with resin.io recently (@hedley, @mccollam, and others on the team), and one of the consistent issues that came up a lot, is getting people up and running with required prerequisites, even from the level of having git installed… To help with this, I was checking out a bunch of cloud IDEs that would help us with a consistent experience. Many of them work very well, though with different trade-offs. Would like to do a detailed comparison later.
In the meantime, though, I wanted show one example I’ve just tested, one that seems to cut it at least for basic development, Codeanywhere.
Setting up, cloning, and pushing a project
The basic view of Codeanywhere is pretty simple and familiar, a “file system tree” view on the left, and an editor in the middle.

Could start from scratch, following the resin.io getting started guide, adding a Dockerfile, etc. For simplicity, here I used one of our demo projects, simple-server-node. It is available on Github, and copying its address (from the “Clone or Download” button) https://github.com/resin-io-projects/simple-server-node.git, I can create a new environment in File > New Connection > Git from URL:
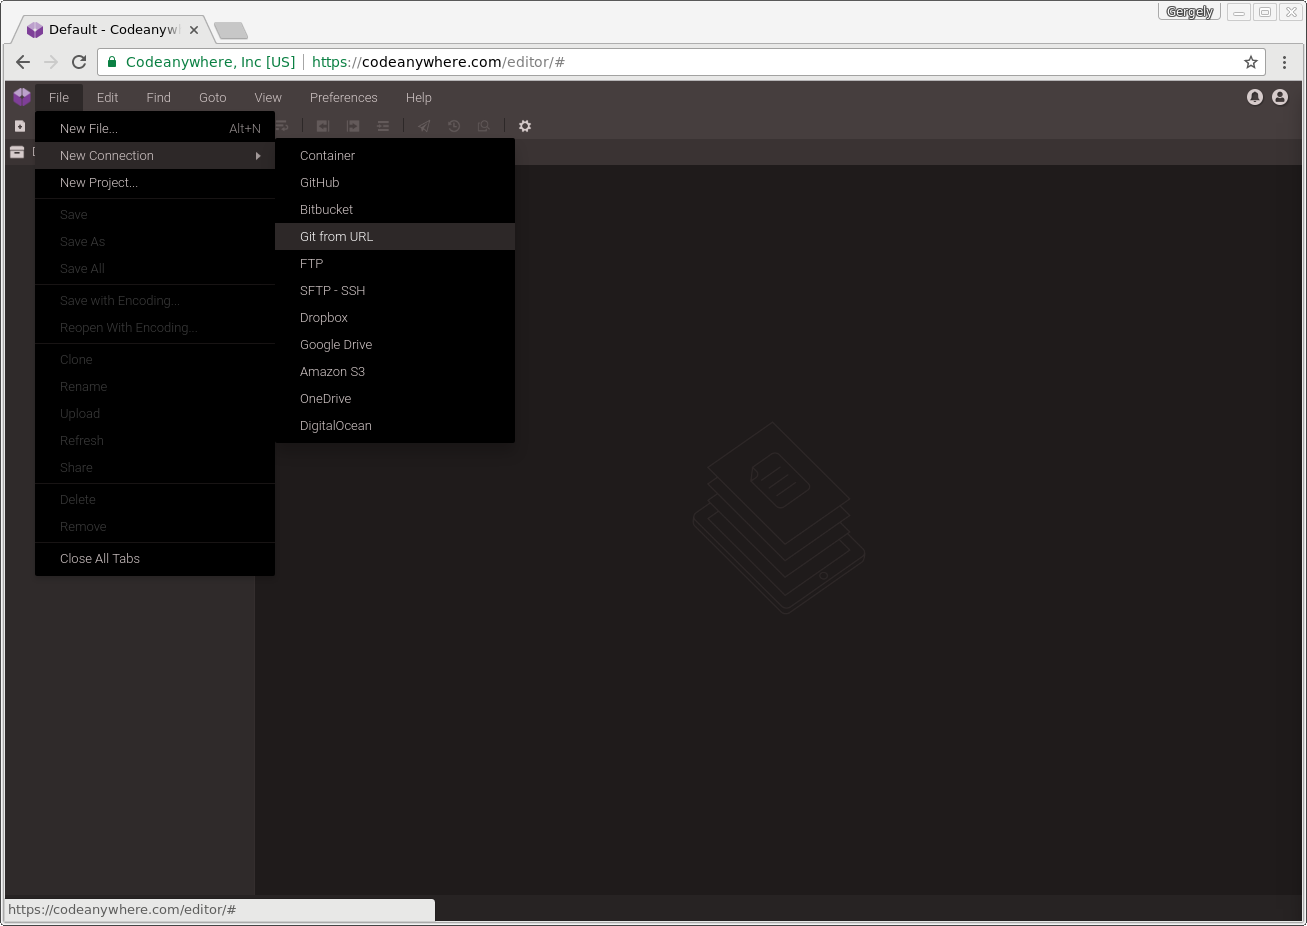
Note: I’m using the Git from URL, not the GitHub connection, as the latter only seem to be able to use my own repositories, not “any Github repo”, as I sort of expected.

Once the git address is added, I set a name and choose a stack. I’m choosing here a Node.js stack, so I can use resin-cli in the cloud too. Otherwise could just choose a Blank stack.

In a few seconds the project is cloned and the source code shows up in the left sidebar. Ready to hack on a project!

After getting the code, and modifying it, the next thing is actually deploying. For this, I need to authorise my user’s Codeanywhere ssh key on the resin.io side. Get the ssh key from the upper right user icon > Account Dashboard > SSH Keys section (direct link)

Copy that key and add it to resin.io at Dashboard > Preferences > SSH keys section (direct link)

Once this is set up, I can push code to resin.io. That is done on the command line, in the SSH console of the development environment. That can be opened through the right-click menu on the project name, and selecting SSH Terminal.

Then added my application (created in the meantime in the resin.io dashboard) using the usual git remote add ... command, and ready to do a git push resin master:

After all this, we are in business: I can deploy to resin.io devices from anywhere in the world where I can connect to the Internet!
Advanced: resin-cli
resin-cli, the command line control tool to resin.io can be very handy, I used especially the device status check, the resin ssh (to access the running application container) and resin sync (to do quick modifications to the running code before checking it in and git push).
With the Node.js stack, resin-cli can be installed simply by running npm install -g resin-cli in the SSH Terminal. Once done, I can log in with resin login: I’m using “Authentication Token” (copied from the resin.io dashboard)

And a quick test with resin sync to a running device:

X X X
I think I have only one free workspace at a time, but it’s so simple to spin one up, and the code should live somewhere on GitHub anyways, that it should not matter much to switch between projects in the beginning.
That was it! Have you tried this? Or any other cloud IDE? (SourceLair, Cloud9, Codenvy, etc…) What do you think?
